The Testimonial Form Settings allow you to customize and control the behavior of your testimonial submission form. Below is an overview of the available settings and how to manage them.
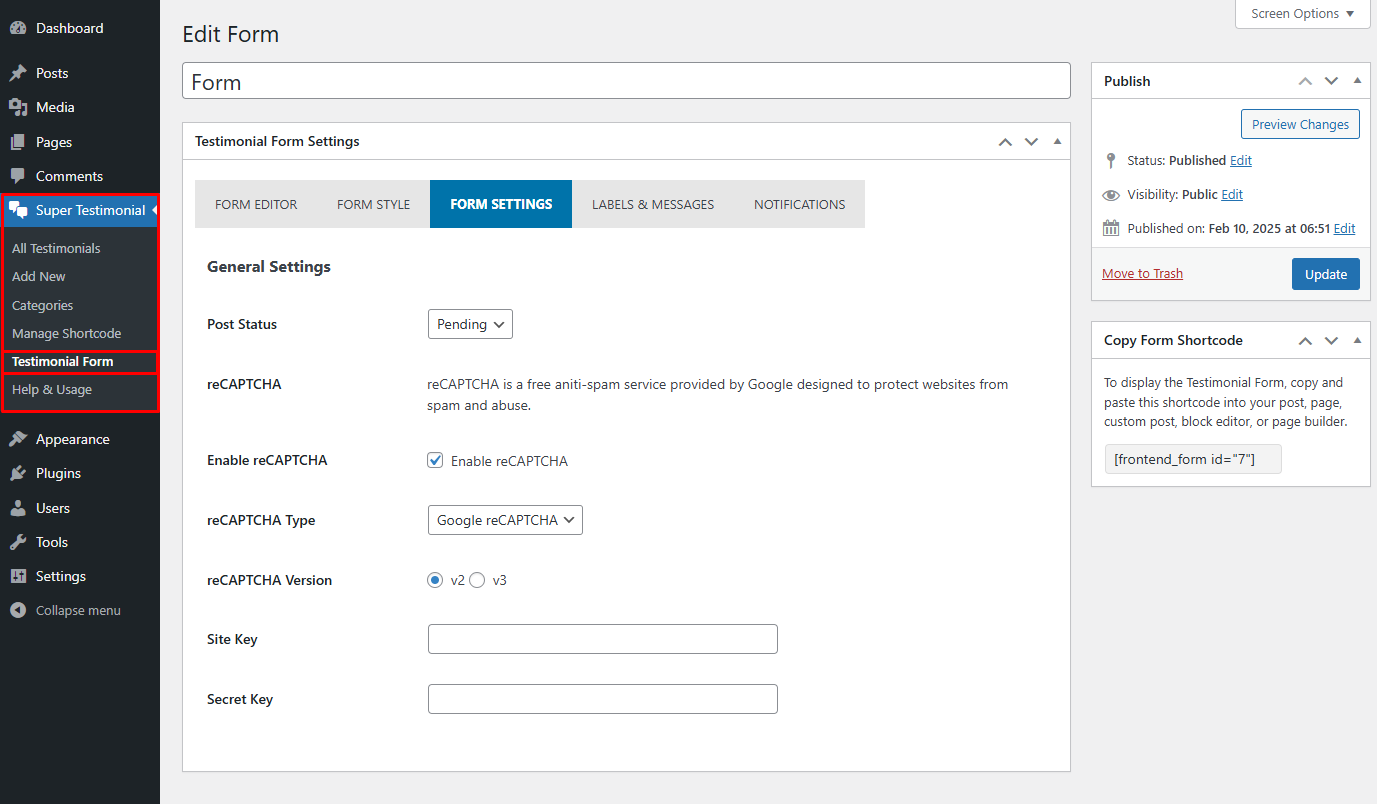
1. Post Status
This setting determines the status of a testimonial after submission.
- Pending: Submitted testimonials will not be published immediately. Instead, they require manual approval by an admin before being displayed on the website.
- Published: Testimonials will be published automatically after submission.
💡 If you want to review testimonials before they appear publicly, keep the status as “Pending.”
2. reCAPTCHA Protection
reCAPTCHA is a free anti-spam service provided by Google to protect your testimonial form from bots and spam submissions.
- Enable reCAPTCHA
- Checked: Enables reCAPTCHA verification on the form.
- Unchecked: Disables reCAPTCHA, allowing users to submit testimonials without verification.
💡 It is recommended to enable reCAPTCHA to prevent spam and ensure genuine testimonials.
3. reCAPTCHA Type
Select the type of reCAPTCHA to use for verification.
- Google reCAPTCHA: Uses Google’s reCAPTCHA system to prevent automated spam submissions.
4. reCAPTCHA Version
Choose the version of Google reCAPTCHA to be used.
- v2: Displays a checkbox saying “I’m not a robot.”
- v3: Works invisibly in the background, analyzing user behavior to detect bots.
💡 If you prefer a simple user experience, choose reCAPTCHA v3, as it doesn’t require user interaction.
5. Site Key & Secret Key
To use Google reCAPTCHA, you need to enter your API keys:
- Site Key: This key is used to display the reCAPTCHA widget on your website.
- Secret Key: This key is used on the backend to verify user responses.
Conclusion
The Post Status and reCAPTCHA settings help you control testimonial approval and prevent spam submissions effectively. Be sure to configure these settings according to your website’s requirements.